Fall desserts deserve a genre of their own, a genre of immaculately magical and mystical vibes. I highly encourage you to try this No Bake Biscoff and Pumpkin Cheesecake recipe! Each bite of this marvelous cheesecake will be a pleasurable fall experience.
The crust of this cheesecake is a beautiful piece of art that encompasses its heart-melting insides. Delicately crafted, the crust is made of Biscoff cookies that are morphed into a golden throne, holding up the cake and creating an immaculate after-taste of pumpkin spice.
Elegant, alluring, and absolutely delicious, this No Bake Biscoff and Pumpkin Cheesecake will have you hooked and give you one more reason to fall in love with the fall (pun intended lol)! However, this love will extend to an all-year craving.
A Yearly Seasonal Sensation

The Perks of Being a Biscoff Pumpkin Cheesecake
This beautifully peculiar Biscoff pumpkin cheesecake incorporates contrasting flavors and artistically harmonizes them.
Coming in at number one: the Lotus Biscoff crust is the first to enter the stage (aka your palate). It introduces a heart-warming buttery sweetness intertwined with warmly toned pumpkin pie spice.
At this point, you will have delved deeper into the layers of the cheesecake, reaching the luxuriously velvety filling of rich and slightly tangy flavor that is balanced by the comforting earthiness of the pumpkin purée.
Here, the sour cream and powdered sugar create a harmonizing touch, and they are further brightened by the lemon juice for a citrusy twist, perfectly balanced alongside the richness of the vanilla extract.
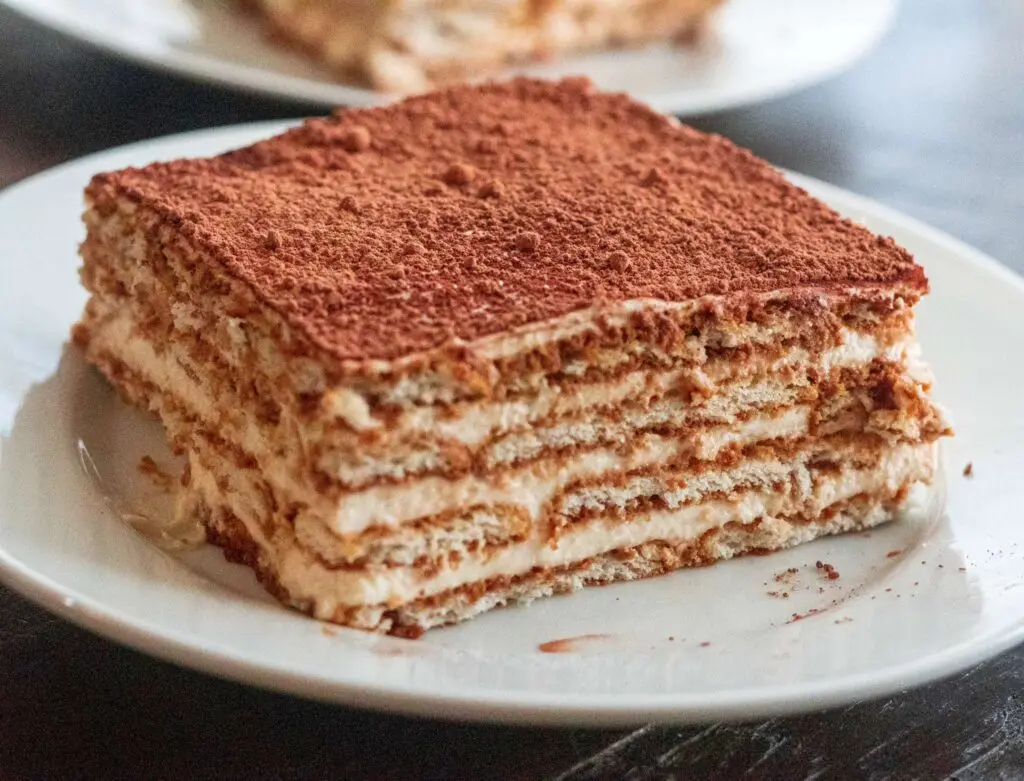
If you’re into this type of dessert, I recommend Pumpkin Spice Tiramisu, No Bake Mango Cake, and Easy Blueberry Almond Ricotta Cake. Each of these desserts has its own beautiful perks and twists.
Irresistibly Scrumptious and Creamy

A Sweet Tooth’s Guide to Cheesecake Wonderland
A phenomenal array of flavors is orchestrated within each bite of this Biscoff pumpkin cheesecake where the pumpkin, cinnamon, and slight burst of lemon juice assemble to create a lively sweet delicacy.
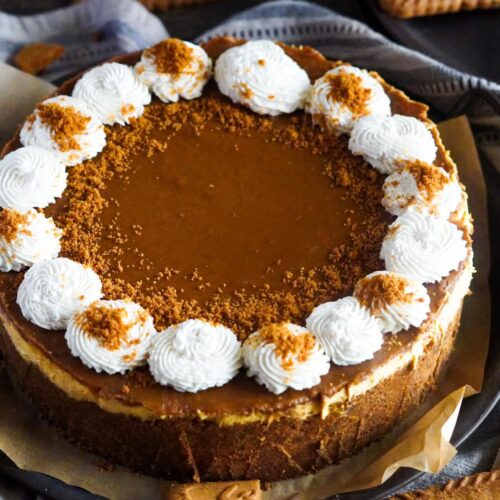
To illustrate, the top layer is a generous spread of Biscoff for a caramelized, fancy finish. This top is further decorated with whipped cream and a magical sprinkle of pumpkin spice, all the way from Neverland!
The perfect texture, magical aura, and autumnal vibes of this no-bake cheesecake promise a well-enjoyed dessert experience that perfectly suits any occasion.
Dreamy Cheesecake: Starring Pumpkin and Biscoff
There are numerous ways through which you can elevate this cheesecake.
To begin with, you can harness the beauty of simplicity by crushing some Biscoff cookies and sprinkling those crumbs over the cheesecake.
Additionally, you can drizzle classic caramel, add some dusted cinnamon on top, and make this recipe into mini cheesecake bites.
Furthermore, this recipe works beautifully with seasonal fruits! You can add sliced figs, pomegranate seeds, and candied cranberries to freshen up your dessert and add a flavorful pop of color.
Another way to magnify the beauty of this recipe is through using chocolate. Grate chocolate of your preference, be it dark or white, and sprinkle over the top of the dessert.
Alternatively, drizzle the top of the cheesecake with glossy chocolate ganache for the ultimate sweetness.
Also, you can add edible gold leaves for royalty vibes along with toasted nuts like walnuts, pecans, or almonds for added décor and texture.
Last but not least, you can go down a fancier route by adding decorative edible flowers such as pansies or violets. The color contrast will add elegance to your cheesecake.
Autumnal Mona Lisa

Pro Tips
For a consistently silky filling texture, use high-quality canned pumpkin purée.
You should keep whipping the heavy cream until you see stiff peaks, but stop before it turns into butter from over-beating.
For the best layering technique, gently fold in the whipped cream in two parts. This maintains the airiness quality of the filling.
For the flavors to harmonize and set properly, put them in the fridge overnight.
Visual appeal is important, especially if you are hosting a gathering or an event. You can level up your cheesecake by drizzling pumpkin, chocolate, or caramel syrup on top. Get your creative juices going!
Frequently Asked Questions (FAQs)
You can use fresh pumpkin purée instead of the canned version, but make sure that it is perfectly drained and puréed. For the crust, Lotus Biscoff cookies are the best option, but you can still experiment with other cookies of your choice. You can also play around with spices!
Just make sure you closely follow the recipe instructions; press the crust firmly into the pan and refrigerate it sufficiently. This guarantees a perfect crust that holds its shape.
Yes! Make this cheesecake and throw it into the refrigerator until you need to serve it.
Definitely! You may store the leftovers for up to seven days in your refrigerator.
You can substitute the stand mixer with a hand mixer or a whisk.
Sprinkle Some Autumn Fairy Dust!

Ingredients
Filling:
Cream cheese
Pumpkin purée
Sour cream
Heavy whipping cream
Powdered sugar
Pumpkin pie spice
Lemon juice
Vanilla extract
Crust:
Lotus biscoff cookies
Unsalted butter
Pumpkin pie spice
Topping:
Biscoff
Whipping cream
Pumpkin spice
Powdered sugar
Steps to Prep
To Make The Crust:
Add your lotus Biscoff cookies to a food processor and process until completely fine.
Transfer to a bowl and add the unsalted butter and pumpkin pie spice.
Mix well until well combined.
Press into the bottom and sides of your 9inch springform pan. Take A LOT of time pressing the crust down, because this will help you remove it from the pan more easily.
Use the bottom of a cup to help you push the crust into the bottom and sides. If anything crumbles, just keep doing it until it sticks.
Place the crust into the freezer for a minimum of 20 minutes.
To Make The Filling:
Add your cream cheese and pumpkin into the bowl of a stand mixer using a paddle attachment.
Beat until smooth, and no longer lumpy. You want to stop and scrape down the sides and bottom often.
Add in the sifted powdered sugar and sour cream and beat again. Add the lemon juice, pumpkin spice, and vanilla, before beating well until smooth.
In another bowl, using the whisk attachment, beat the heavy cream until stiff peaks. Don’t over beat as it will turn into butter.
Fold in the whipped cream into the cream cheese batter in 2 parts, be careful not to overmix it.
Now, pour the filling on top of the chilled crust and smooth over the top.
To top it, melt half of a Biscoff spread jar into the microwave in 10-second increments and pour on top of the cheesecake.
Refrigerate for a minimum of 8 hours, preferably overnight.
To Decorate:
Beat heavy cream and pumpkin pie spice with a little powdered sugar and pipe on top using a piping bag.
To Serve:
Loosen the edges with a sharp knife carefully, making sure to go all the way down to the crust. You should be able to completely lift the cheesecake and transfer it onto a cake plate.
Serve immediately.
Dive into This Divine Blessing!

Other Must-Try Recipes:
Nescafe Cake (Ice Box Coffee Cake)
Layali Lubnan (Lebanese Nights Dessert)
Easy Blueberry Almond Ricotta Cake
Orange Cardamom Olive Oil Cake
If you’ve tried this recipe, don’t forget to rate it and leave a comment below! I would love to hear about your experience. You can follow me on Facebook, Instagram, and YouTube.
No Bake Biscoff and Pumpkin Cheesecake
Equipment
- Stand mixer
Ingredients
Filling:
- 3 blocks cream cheese softened, room temperature (Each block of cream cheese is 8 ounces)
- 1 can pumpkin purée (one can of pumpkin purée equals 15 ounces)
- ¼ cup sour cream
- 1 cup heavy whipping cream
- 2 cups powdered sugar sifted
- 1½ teaspoons pumpkin pie spice
- 1½ teaspoons lemon juice
- 1½ teaspoons vanilla extract
Crust:
- 40 Lotus Biscoff cookies
- 10 tablespoons unsalted butter melted
- ½ teaspoon pumpkin pie spice
Topping:
- ½ jar Biscoff warmed and slightly melted in the microwave
- ½ cup whipping cream whisked until stiff peaks
- ½ teaspoon pumpkin spice
- 2 tablespoons powdered sugar
Instructions
To Make the Crust:
- Add your lotus Biscoff cookies to a food processor and process until completely fine.
- Transfer to a bowl and add the unsalted butter and pumpkin pie spice.
- Mix well until well combined.
- Press into the bottom and sides of your 9inch springform pan. Take A LOT of time pressing the crust down, because this will help you remove it from the pan easier.
- Use the bottom of a cup to help you push the crust into the bottom and sides. If anything crumbles, just keep doing it until it sticks.
- Place the crust into the freezer for a minimum of 20 minutes.
To Make the Filling:
- Add your cream cheese and pumpkin into the bowl of a stand mixer using a paddle attachment.
- Beat until smooth, and no longer lumpy. You want to stop and scrape down the sides and bottom often.
- Add in the sifted powdered sugar and sour cream and beat again. Add the lemon juice, pumpkin spice, and vanilla and beat well until smooth.
- In another bowl, using the whisk attachment, beat the heavy cream until stiff peaks. Don’t over beat as it will turn into butter.
- Fold in the whipped cream into the cream cheese batter in 2 parts, be careful not to overmix it.
- Pour the filling on top of the chilled crust and smooth over the top.
- To top it, melt half of a Biscoff spread jar into the microwave in 10 second increments and pour on top of the cheesecake.
- Refrigerate for a minimum of 8 hours, preferably overnight.
To Decorate:
- Beat heavy cream and pumpkin pie spice with a little powdered sugar and pipe on top using a piping bag.
To Serve:
- Loosen the edges with a sharp knife carefully, making sure to go all the way down to the crust. You should be able to completely lift the cheesecake and transfer onto a cake plate.
- Serve immediately.
Notes
- For a consistently silky texture of the filling, use high quality canned pumpkin puree.
- You should keep whipping the heavy cream until you see stiff peaks but stop before it turns into butter from over-beating.
- Gently fold in the whipped cream in two parts. This maintains the airiness quality of the filling.
- For the flavors to harmonize and set properly, put them in the fridge overnight for best results.
